Posts

Showing posts with the label handmade

Fast Sew Zipper Pencil Bag ~ Sew With Me

Image
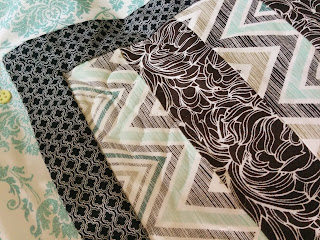
This is such a fast and fun project you will be making zipper bags for everyone you know! Supplies needed: 1/4 yard cotton fabric for the outside of the bag 1/4 yard cotton fabric for the lining 1/4 yard fusible interfacing 9 inch or longer regular zipper 9 1/2 inches elastic Straight pins Thread How to prep your project Cut 2 rectangles 9.5 inches by 4.5 inches of both fabrics and the fusible interfacing. Fuse the interfacing to the outer fabric You are now ready to follow along with the video!  The video will show how your rectangles should look. This project usually takes me under 20 minutes from start to finish if I am not filming it. For beginning sewists, expect to spend 45 minutes to an hour to complete the first bag.  If you click through to watch on YouTube there are timestamps in the description.

Project Planning for 2020 ~ Sew with Me

Image
🎇Happy New YEAR!!! 🎇   Click below for my vlog on projects for the new year and some sewing related gifts I got.  I have sooooo many ideas and would love to hear from you. Please let me know if there is something sewing related you would like to learn about.  Check back next time and make a little pencil zipper bag! Find more sewing videos here:  Sewing and Such Video Playlist See some of my projects for sale: My Etsy Shop RobbinsNestStudio Find fun sewing related gift-y things:  TeeSpring Shop

Serged Fleece Blanket With Foot Pocket ~ Sew With Me

Image
Here is a fast project you can make in an afternoon! It is a serged, lined, fleece blanket with a pocket for your feet! I made this one very large for an adult but it would be easy to adapt for children. Fabric: Fleece from Hobby Lobby Overlock/Serger: Bernette 334DS Sewing Machine: Bernina 770QEE Thread: Overlock cones, and Wooly Nylon This project used 2.5 yards of each fabric for a finished blanket 6 feet long and 4.5 feet wide (72"x54"). The pocket is 16 inches deep. Check out my TeeSpring Shop

Making Tab Backed Curtains

Image
It takes a while for a new house to feel like home. For me, it is all the personal touches.   I finally got my sewing space set up so I can work again! This room is larger than my last one but it is in the basement and has NO windows! UGH! I am so thankful that the Bernina has so many wonderful lights on it or it would be a nightmare to sew in there. I am working on getting some better light and we will eventually open up the rest of the basement allowing natural light in. This is a lovely Waverly fabric I ordered online. Our new house has high ceilings and I needed 9 yards to make two curtains! 😲 I also bought 9 yards of plain curtain lining. It is actually very easy to make lined curtains. A lined curtain will last longer, hang better from the rod, and block light better. Plus, it just looks finished and professional. I chose to make the tabs out of the lining to conserve the more expensive fabric. I want to make a few throw pill...

Essential Oils on the Go

Image
My teen son recently went to two different week-long camps.  He is the reason we started the oily journey so he definitely takes oils with him. This year I sent small sample bottles with the basics that everyone needs and his main oils in full-size bottles. I found these little boxes in the school supply section at Wal-Mart for a dollar. They are perfect for a small kit and the hard box protects the bottles. My son carried it in his backpack with him. It is a great purse, or diaper bag size too. I like to travel with my oils in a padded zipper bag.  This is the one I use the most. I made it and have more like it in my Etsy Shop, Robbins Nest Studio . You can click the tab to visit my shop. I have also used a train case if taking lots of oils for a class out of town or visiting family for a while.  It is hard sided and can hold a lot of oils along with empty capsules, carrier oils and more. I got...

Pillowcase Sewing Tutorial

Image
In my everyday life, I am a sewing teacher and homeschool mom. That is what I went to college for, and it really is my passion. I am doing a few videos with step by step instructions for my sewing students. This lets them continue to work on projects at home or remake them with confidence. But, anyone can sew along! Here is my  first   sewing tutorial video on pillowcases. It is the first project my students make and one that does not need a paper pattern. This is a long step by step tutorial with close up images and explanations on why I do what I am doing.  Scroll below for written step by step instructions. Comming soon - reversible tote bag with variations. Supplies: ¾ yard cotton woven fabric for the body of the pillowcase 1/3 yard cotton woven fabric for the band of the pillowcase Thread to match fabrics 1 ½ yard lace (optional) Thread to match lace Two pillowcases will be made during the video, scenes will go back and f...

Setting up my new sewing space!

Image
My two daughters both moved out of state to attend college this August. This is how I have been consoling myself for the last month. That is my hubby has done much of the work and I have chosen all the fun colors and furniture. :)  The room before we started.  New paint makes it cheery and bright! It is Tiffany blue.  Sewing corner! I put this on the wall with the door so when you look into the room you don't see the sewing mess if there is one. ;)  I have had this sewing unit for many years and it works perfectly for me. It can fold away  into a sideboard. New ironing board cover because everything has to match. I put the ironing board at chair height so I can just swivel and press. Saves my back too! The ironing board and iron have a hanger in the closet for when I am not using them.  I LOVE this desk shelf unit. The shelf can rotate to make a corner or L-shaped space. My hubby found the chair for me and changed the casters to ...

Jelly Roll Quilt Update!

Image
I am finally getting back to my quilt. Click the  create and craft  tab above to see where the quilt is now.